I can finally post a game AAR on a RJW topic. Unfortunately it is not the long awaited RJW land battle, but something even better, The Battle of the Yellow. I started as a naval wargamer many years ago and it was great to return to my roots.
The gamemaster, Micheal M. had a collection of 1:2400 RJW ships and I have been bugging him to put on game. So Saturday’s 28 February the two fleets came together for a mighty naval action. Micheal had been playtesting a RJW modification of the classic A-H game Jutland. While I hadn’t previously consider using those rules as a basis for RJW naval gaming, the end result worked remarkably well. There are still some bugs to be worked out and our end of game AAR examined players’ feelings toward the rules and some recommendations for tweaks. Those discussions are posted at the end of this AAR report.
Yellow Sea was the second largest naval battle of the war. It is not a particularly well balanced scenario, so the victory conditions were set to reflect that. The Russian would try to get as many of their battleships past the Japanese Navy as they could, the Japanese would attempt to stop them.
We had six players present: two Russians (I was one), three Japanese, and Micheal was the gamemaster. Three players had previous experience with Jutland (myself included) and one player was completely new to naval gaming. I commanded the Russian battleline and my subordinate commanded the cruisers and destroyers. One Japanese player commanded the Japanese battleline, one the Japanese light cruisers and destroyers, the other the Japanese large cruisers and torpedo boats. The Russian were in the west sailing east, the Japanese were the opposite.
Russians:
Battleline – Tsesarvitch, Retinas, Pobieda, Sevastopol. Poltava.
Askold, Pallada, Diana, Novik.
4 DD flotillas
Japanese:
First Division: Mikasa, Asaki, Fuji, Shkishima, Kasuga, Nisshin.
Third Division: Yakumo, Kasagi, Chitose, Takasago
Fifth Division: Hashidate, Matsushima, Itsukushima.
Sixth Divison: Akashi, Suma, Akitusuhima, Idzumi, Chiyoda
6 DD Flotillas, and 6 TB Flotillas.
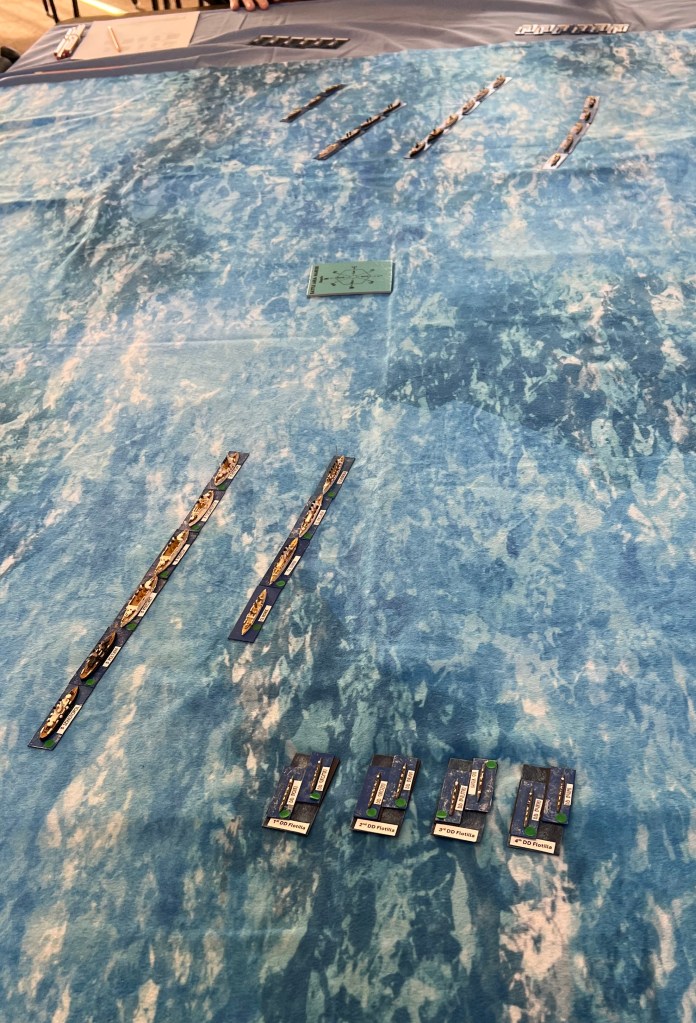
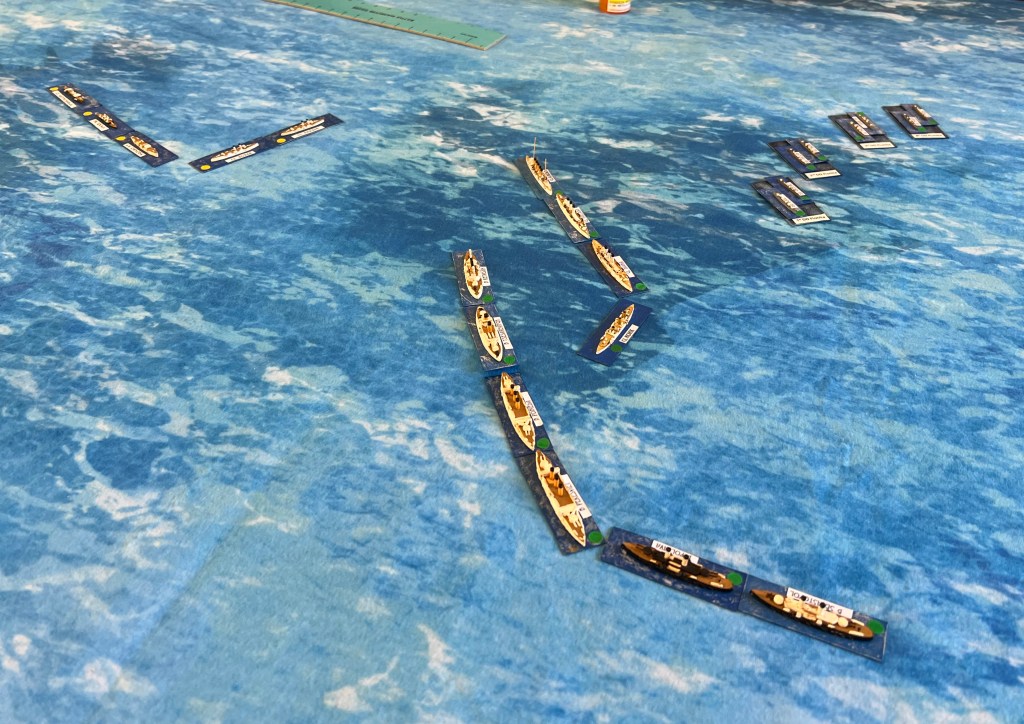
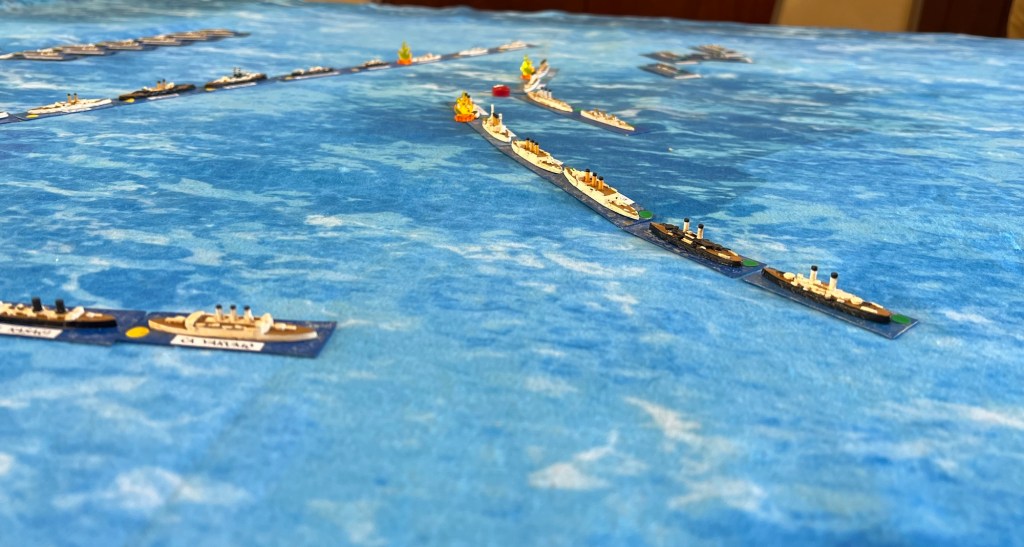
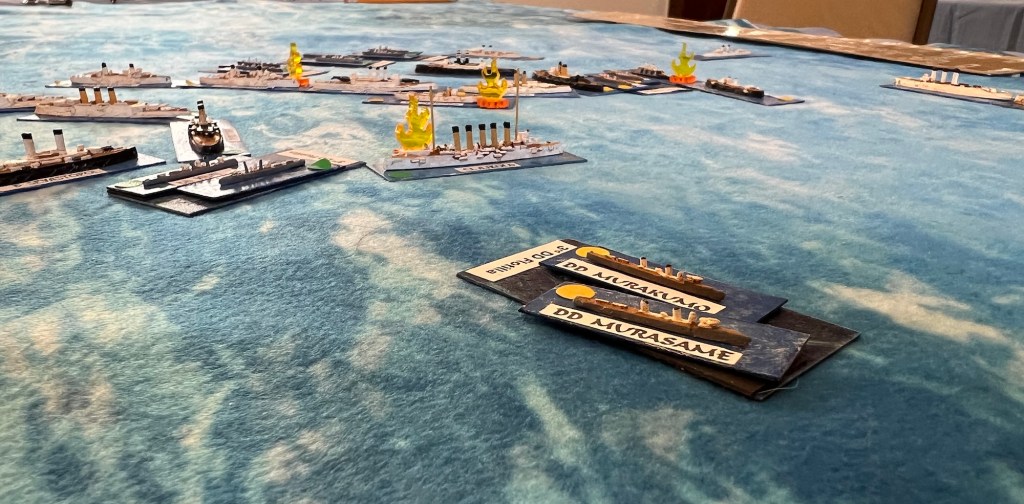
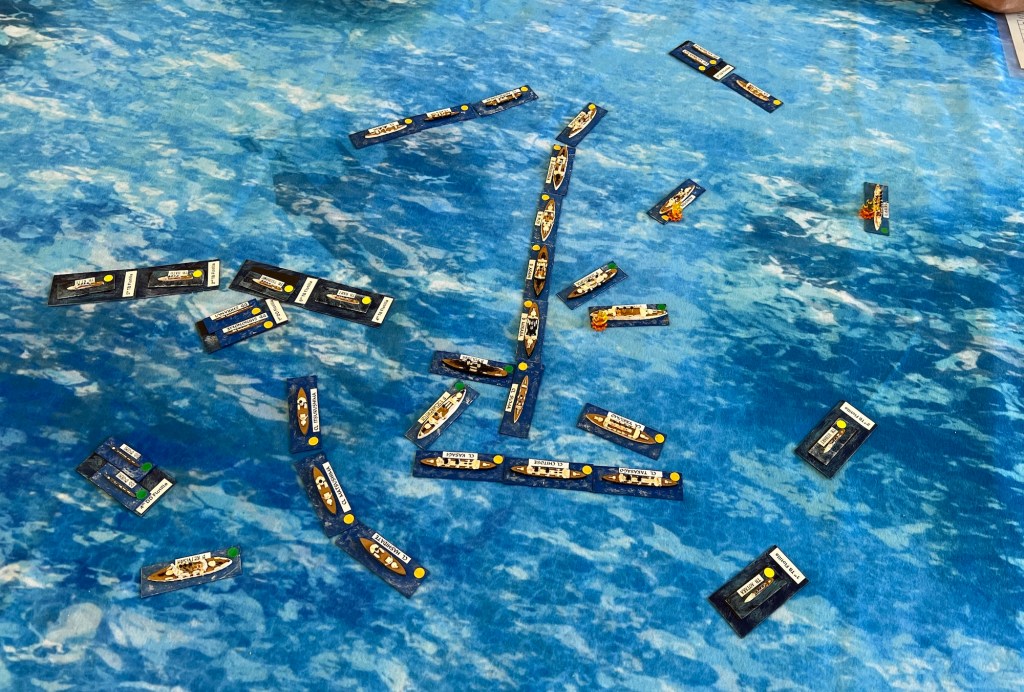
The start of the battle looking from the Russian side to the east.
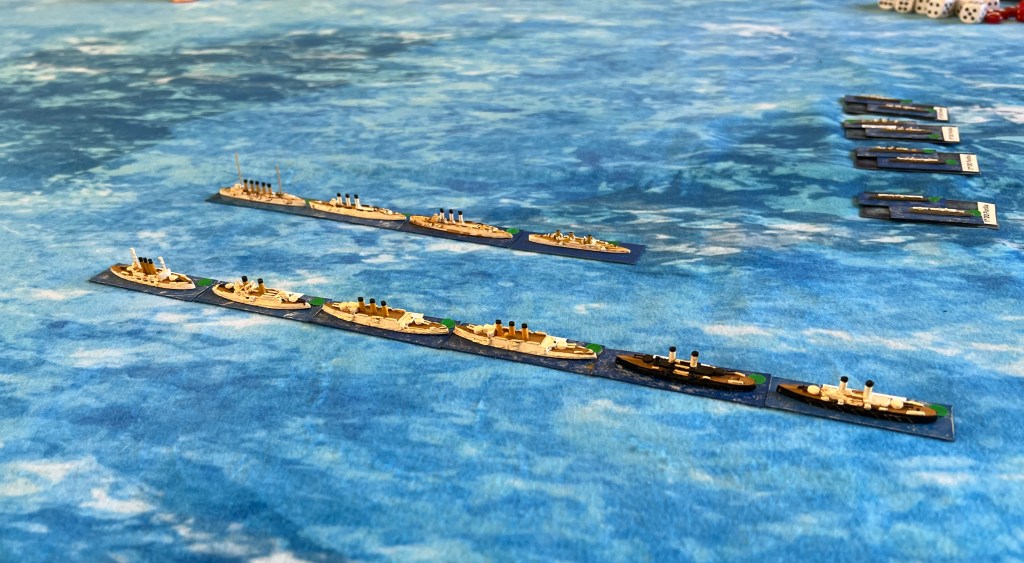
The Russian line sailing east. I didn’t notice until later that Retvisan was leading the Russian battleships instead of Tsesarvitch. I finally flipped the two later in the battle.
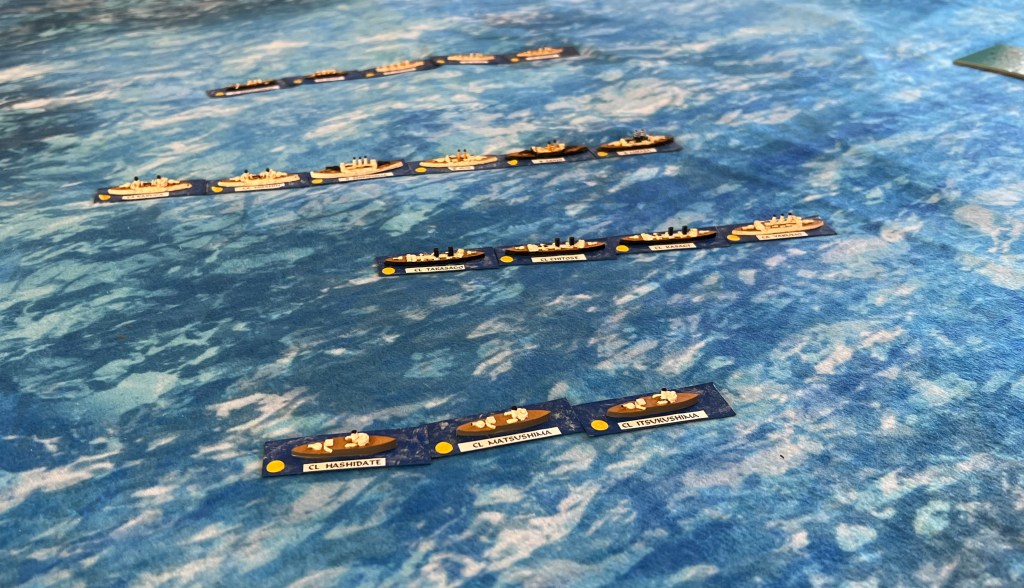
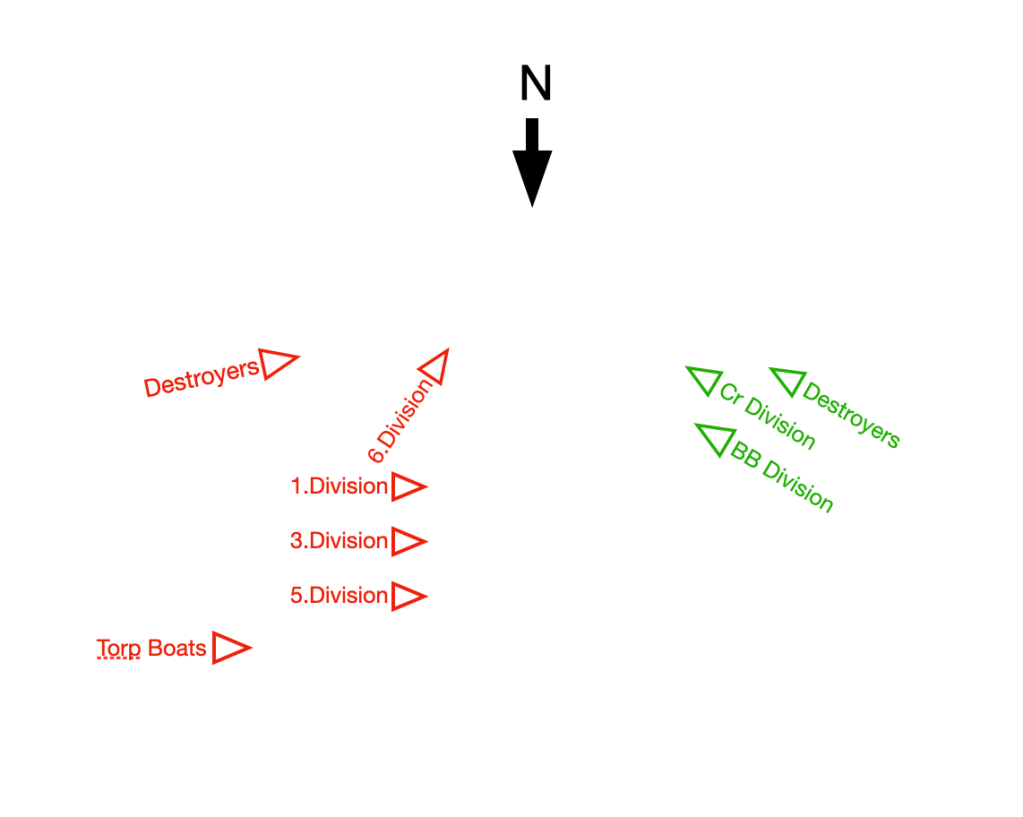
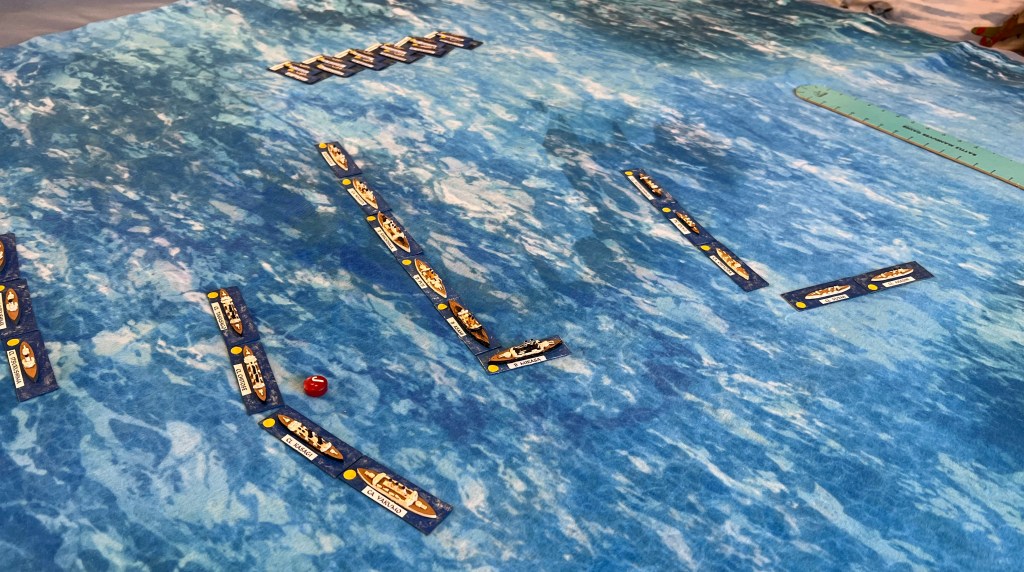
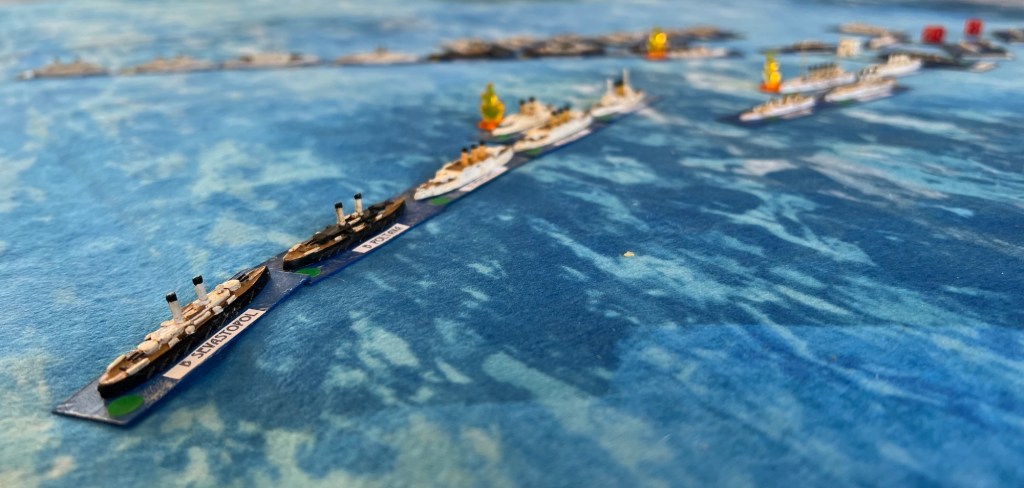
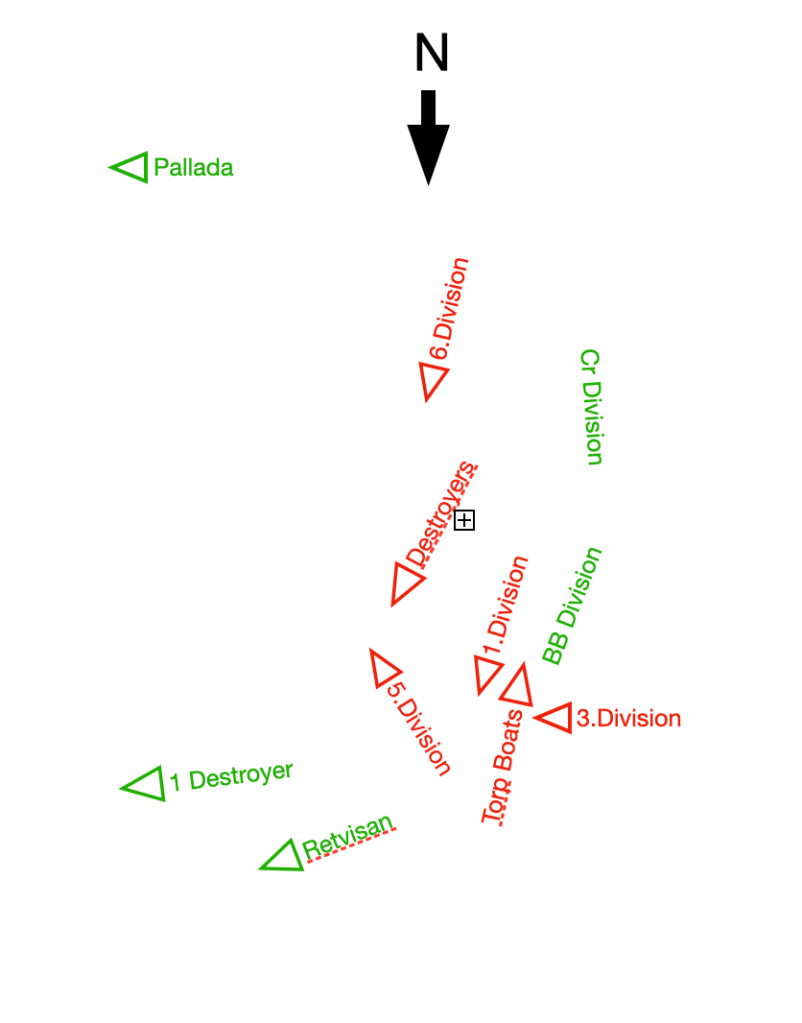
The Japanese line sailing west. 5. Division is in the foreground, with the 3.Division next, then the 1.Division, and finally the 6.Division. Destroyers and Torpedo Boats are behind off to the left.
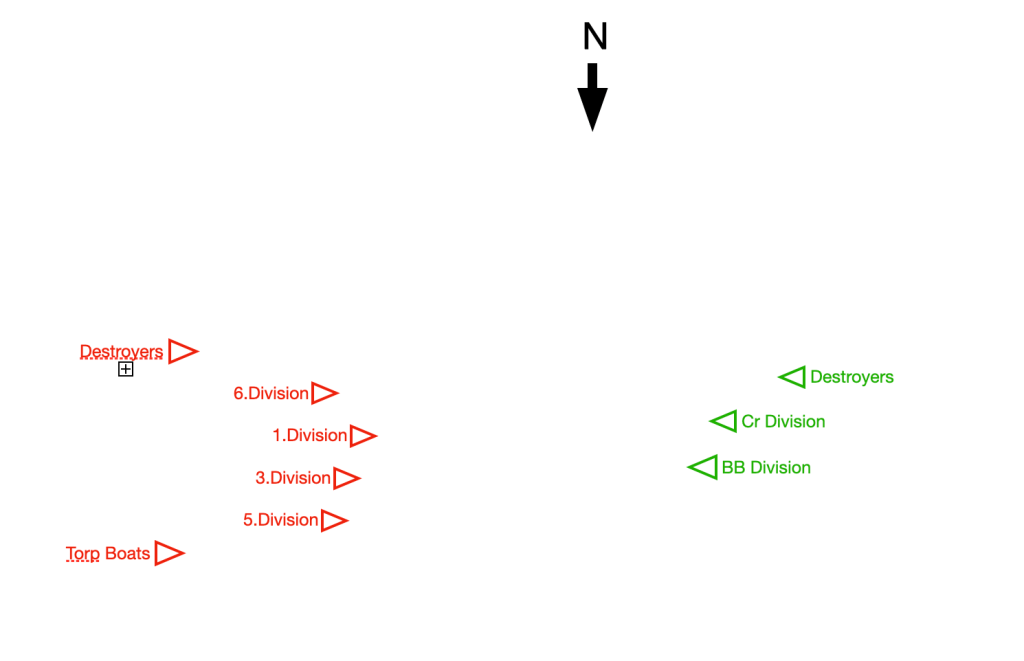
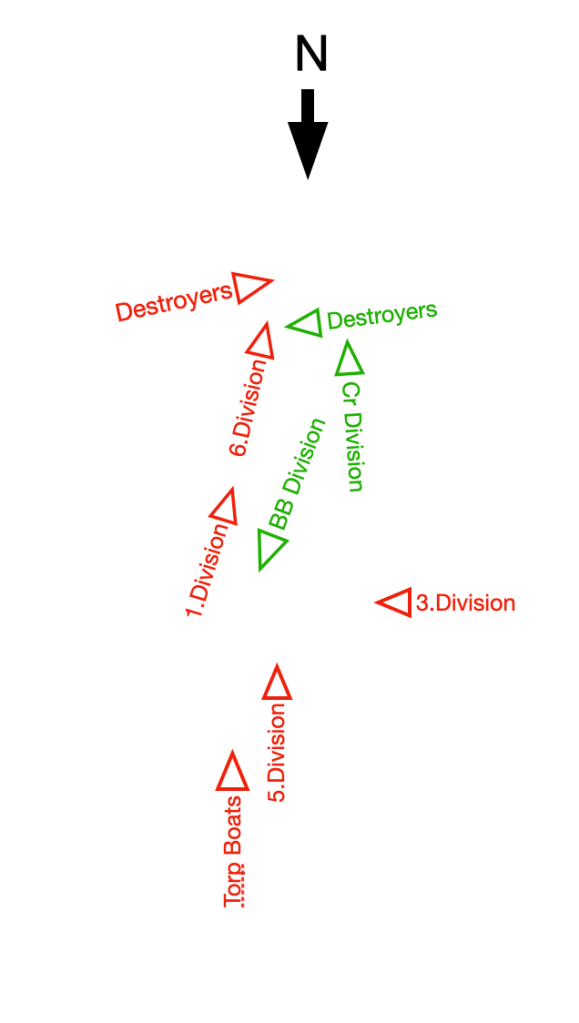
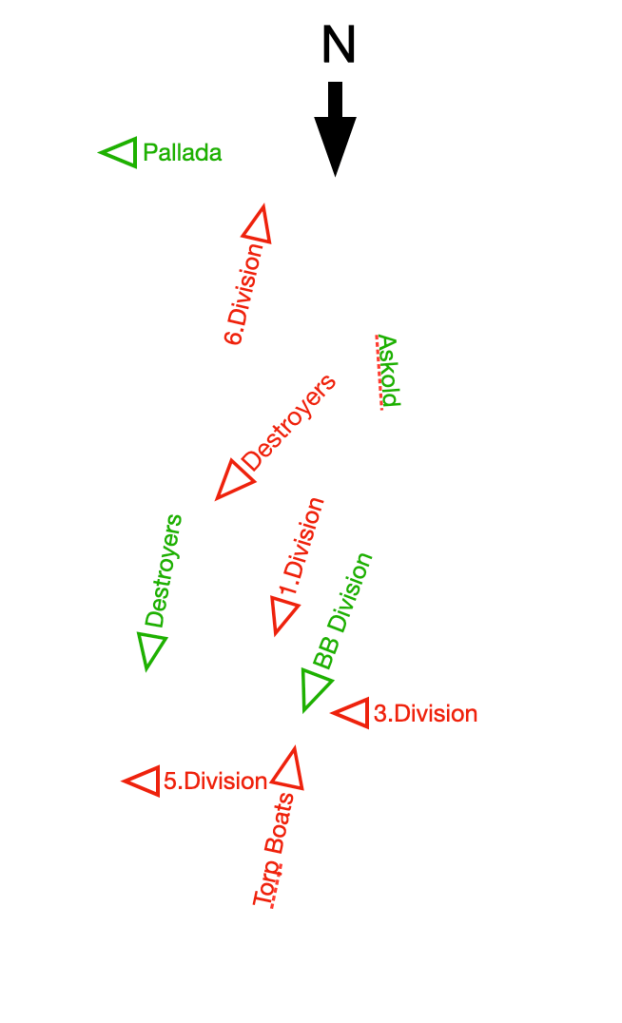
Map of the start of the battle. Japanese red and Russians are green.
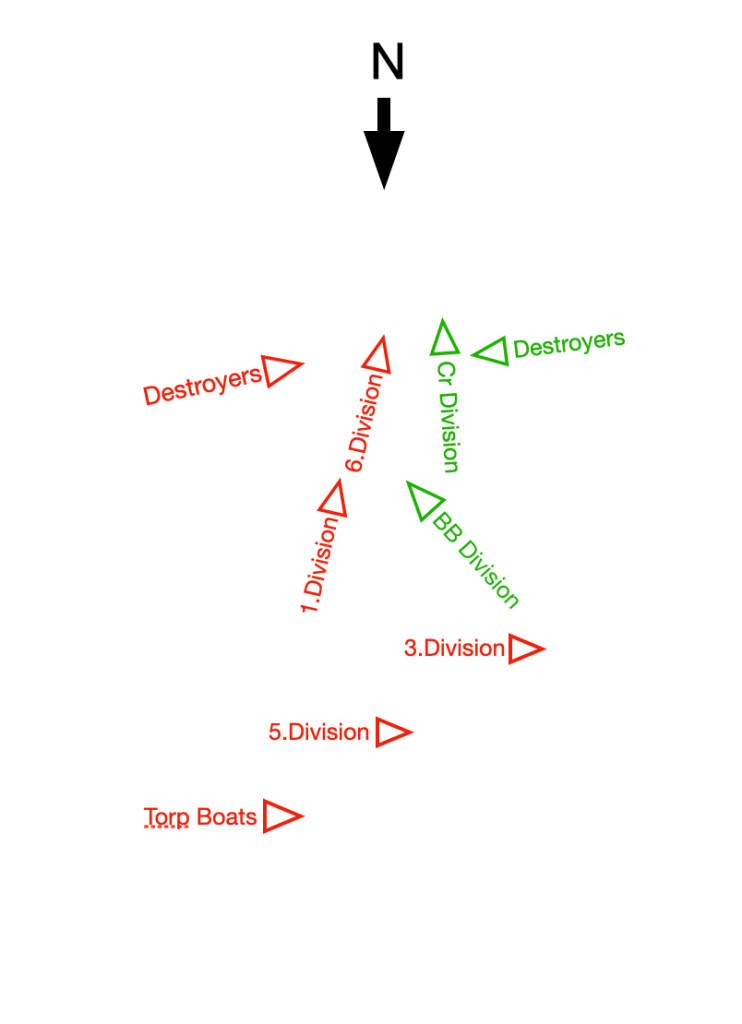
Range closed down to under 14k when the Russians opened fire. Japanese returned fire, but no hits were scored. The Russians then decided to turn to the southeast at 1330 and work past the Japanese light cruisers of the 6.Division. The 6.Division turn southwest while the 1.Division continued due west before starting its turn north.
Russian Turn
Japanese reaction.
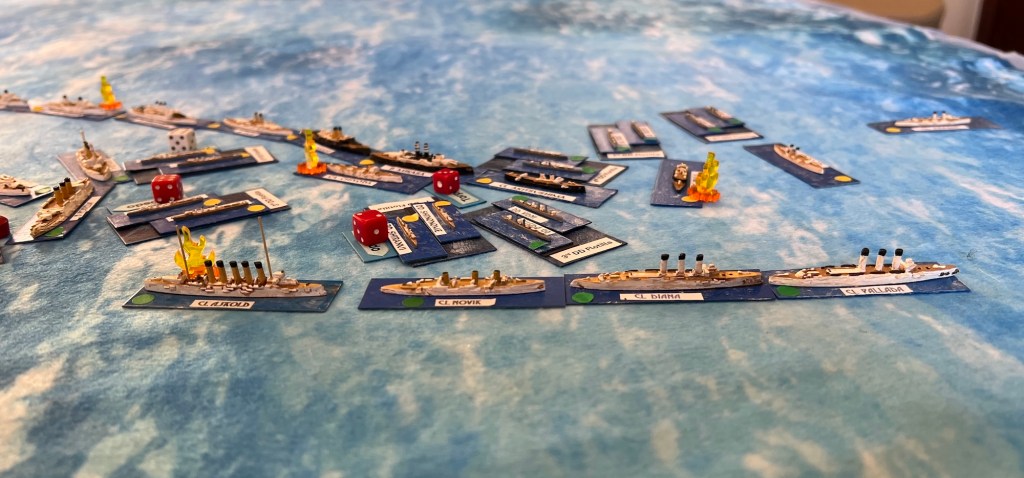
Fire was exchanged but at first no serious damage but that quickly changed. at 1415 both Tsesarvitch and Askold receive critical hits that stopped them dead in the water while Chiyoda received the same. Critical hits would be a major topic during the AAR.
Hits marked on the three ships. The Japanese 1.Division falls in behind the 6.Division while the 3.Division continues to sailing west towards the rear of the Russian line.
The Russians decided to hold their course, passing the immobile Tsesarvitch and Askold. The Japanese did the same passing the Chiyoda. At the same time, both sides committed their destroyers into the fight.
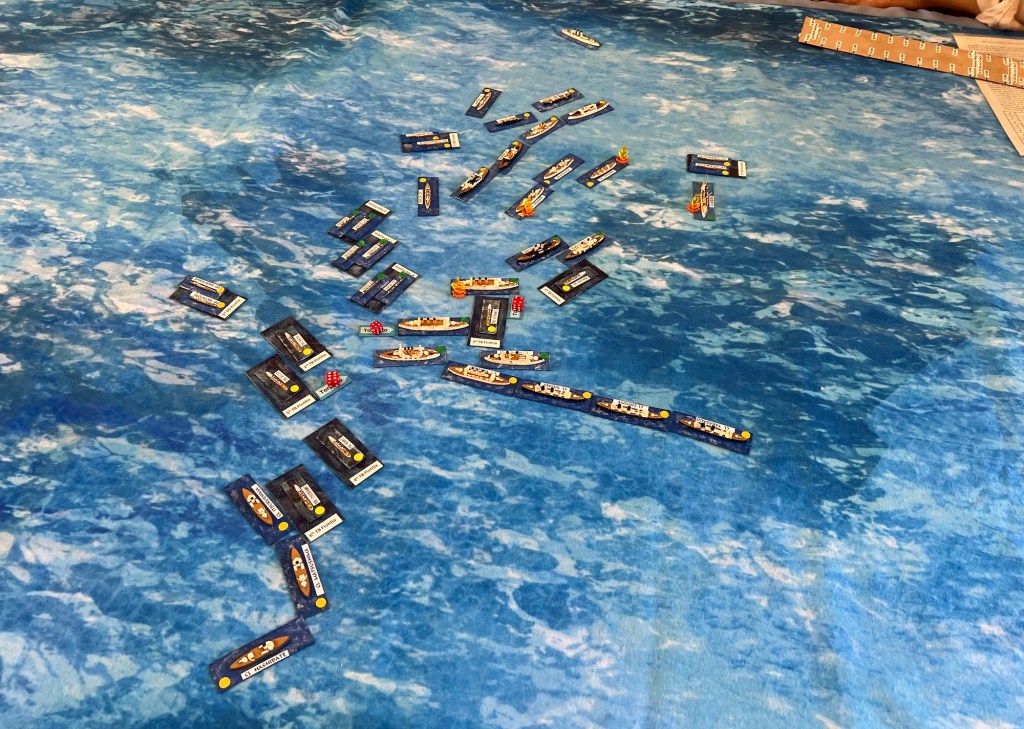
With this threat, the Russian Battle line began to turn north at 1500 while the Russian cruisers continued their move to the south. Tsesarvitch was able to repair the damage and could move at half speed. In the picture brow, one can see the start of the Russian turn north to the left of the picture while the Russian cruisers continue to battle with the 6.Division and the Japanese destroyers.
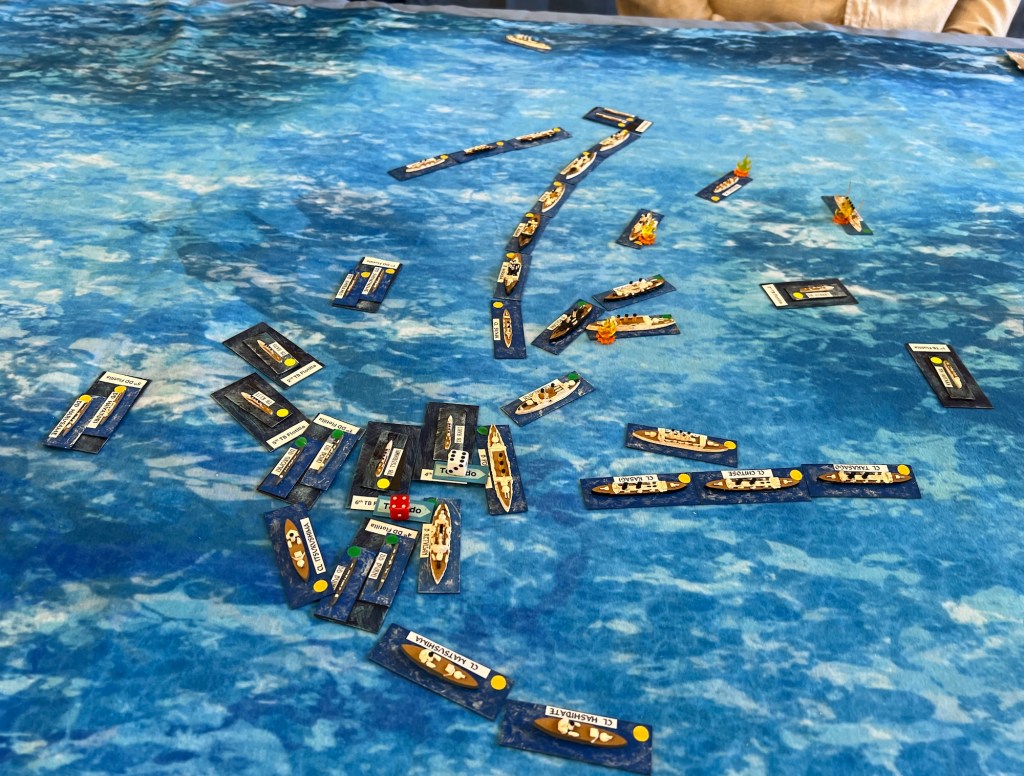
You can see in the background the Russian line turning north while the Japanese line combines moving south, setting up a exchange of gunfire as the lines pass each other. The Japanese got the better of this duel with several Russian battleships taking damage. The Japanese 3.Division is turning back east to the right of the pictures while the 5.Division in the foreground executes a simultaneous turn to the south to close with the Russian ships.

The Japanese Torpedo Boats are following. While the Russian torpedoes didn’t find any targets, two torpedos slammed into Novik, quickly sinking the small ship.
In the continuing exchange of gunfire between the Russian and Japanese cruisers, Diana took a series of hits and slowed to stop and started to sink. That only left the immobile Askold and the the rapidly moving Pallada of the Russian cruiser force. to the right of the picture
The decisive turn of the battle happened at 1530.With the Russian battle line running north, the Japanese 1.Division is behind to the east paralleling the Russian battleships while the 3. and 5.Divisions are blocking to the north. The Japanese scored a critical hit on Sevastopol reducing its speed to less than half and another on Pobieda cutting power to her guns. The other battleships took varying levels of damage. Nisshin of the Japanese 1.Diviviosn also took a critical hit and was immobilized.
At 1545 the Russians are attempting to reform their line, but the critical hits rapidly overcome their effort.

The gunfire exchange was still in favor of the Japanese. At 1600 the Japanese Torpedo Boats attack and torpedoed the Pobieda while more critical hits immobilized the Peresviet and reduced Poltava’s speed. Retvisan managed to avoid the torpedoes while the Russian destroyers and Japanese Torpedo Boats fought against each other with losses on both sides.
By 1615 only Retvisan had a chance to escape. Pobieda was sunk, Peresviet was immobile, Sevastopol, Poltava and Tsesarvitch reduced to half speed. Tsesarvitch and Sevastopol had been battered such that they were defensiveness. The Russian admiral ordered Retvisan and Pallada to make a break for it. Retvisan was able to break through to the northeast while Diana continued east. Both ships were likely to escape. We called the battle at that time.
In all, we were able to play 12 turned in four hours. The game could have gone faster if everyone knew the rules and resolved adjudication simultaneously across the board. As it was, all adjudication was done by the gamemaster which meant adjudication was sequential. Some time was used to help explain situations to the players unfamiliar with naval tactics/maneuvers.
I feel both sides made good moves during the battle. This is a tough one for the Russians to win. If the Russian can transform the battle from a breaking through a blockade to a running gun battle, they have a chance. This is what historically happened until the lucky Japanese hits as the light was failing transformed the battle. This time the Russian weren’t even that lucky. My die rolling didn’t help as I was making the worst rolls at twice the rate of any good rolls, and I rarely got to see a great roll.
In our AAR, all agreed that Jutland proved to be a good basic rule system for refighting large naval battles in the this period. The game was enjoyable for all and are looking forward to another battle. The game moved fast once we got the hang of it and can go faster with experience. There were some rules that still need work to better simulated the period.
If one removed the numerous critical hits, the maneuvers/actions were quite similar to the historic battle. This was one of two areas that required serious rethinking. The frequency and the nature of the critical hits didn’t reflect the period. There was one critical hit that changed the outcome in the actual battle, the two near simultaneous shell hits on Tsesarvitch. That caused the ship to turn and lose speed creating confusion in the Russian line. No ship during the battle was rendered immobile after hours of firing. Any serious damage that actually happened was repaired within 15 to 30 minutes, the Japanese gun explosions being the main exceptions. Even those only reduced firepower but didn’t critically injure the ships. Without the mobility hits, there would have been five Russian battleships still attempting to escape by the 1530 turn. In the actual battle all six Russian battleships remained in the fight and the Japanese were surprised at the speeds they were able to maintain.
The core of this issue is that Jutland uses a single 6-sided die to determine whether a critical hit happens or not, and a 6 is always a critical hit regardless of range and number of fire factors. If a hit is achieved, 4 of the 6 possible results affect mobility with two being dead in the water and two are reduced speed for several turns. A fix was discussed and will be tested in future games.
The second area was torpedo combat. The difficulty here is while both sides during the war saw torpedo attacks as serious threats and took prompt maneuver to avoid being hit, torpedoes attacks were greatly ineffective during the war. Even under near ideal conditions hits were few if any. The real impact during battle was that torpedo attacks forced the enemy to change course based on the perceived threat. There isn’t a good way to replicate this on the wargame table as wargamers know the rules and can better judge the possible outcomes. Combined with players knowing that losing a fleet has no real world impact means player often take risks a real commander would never take. We saw examples of this during the game when both sides passed stationary ships on their unengaged side knowing they couldn’t move the remainder of the game. This allowed the damage ship to do something (firing) while protecting undamaged ships from fire. This behavior was exactly opposite of the history during the war. Making a turn away mandatory is a method, but removes a decision from the player. It also would allow players to make numerous feints to force course changes at no cost to the feinting player. Trying to develop a torpedo attack adjudication system that provides an historically low possibility of hits is not really practical using a 6-sided die. This is a problem I am still trying to think through.
All the other points addressed were minor. I felt that the ranges could be doubled as Jutland had to address significantly longer ranges than those seen in the RJW. Use of angles to assess whether the firing ship is broadside or bow/stern to the target was another small comment.
As previously stated, the group felt that the Jutland system worked quite well for this battle, only needing period focused fixes. The important test was that the game was fun for all and plans for another game is in the works.

Leave a comment